Input
Getting Started
- Prerequisites - Make sure you have the tools you need to make a gaming SBC.
- Single Board Computers - Become familiar with these miniscule marvels of modern technology.
- Images - Learn about the various preconfigured OS builds.
- Cases - Choose a case that meets your needs.
- Storage - Figure out how much space you really need.
- Power Supplies - A bad power supply is the easiest mistake you can make.
- Input - How do you want to control your games?
- Imaging - A simple guide to putting your chosen Image on your chosen storage option.
- Assembly - Various guides for assembling SBCs and cases together.
- Game Sources - A rough collection of links to free and paid games you can legally get for your SBC.
Picking out a Controller
There are a lot of options for controllers. Some people prefer tried and true options like the Xbox 360/Xbox 1 controllers or PS3/PS4 controllers, while others might look into controllers like 8bitdo controllers or even some wired options like the Buffalo USB SNES controller. We'll be talking about a few of the non-wired controllers here. Note: These guides are for Retropie, not for Recalbox. Information from the [Official Retropie Docs]https://retropie.org.uk/docs/).
Xbox 360 Controller
Requirements: Wireless Receiver, WiFi network.
To use wireless Xbox 360 controllers, you will also need a USB wireless receiver plugged into your Raspberry Pi. The Official Microsoft Xbox 360 receiver or a generic brand like zettaguard, VicTsing will work. You can pair multiple controllers to a single wireless receiver. Play and charging cables will not work.
To pair your controller(s) with the wireless receiver:
- turn on your wireless Xbox 360 controller (hold down the Guide button)
- press the connect button on the receiver (green light will start flash)
- then press the tiny connect button on the top of the controller
- you will need to repeat these steps to pair each additional controller
8bitdo Controllers
Please make sure you are using at least RetroPie v4.0, and the controller firmware versions listed below (newer versions shouldn't cause an issue). It is not recommended to use beta firmware versions.
Please see the 8bitdo support page for details on how to upgrade the firmware. Before you upgrade your firmware or attempt to register your controller, please make sure your controller is fully charged.
Guide to add your controller
1) Run the RetroPie setup script, either through the Emulation Station menu option or via the command line.
If you want to run this via the command line, quit Emulation Station by pressing F4 on the keyboard and type this at the command line: sudo /home/pi/RetroPie-Setup/retropie_setup.sh
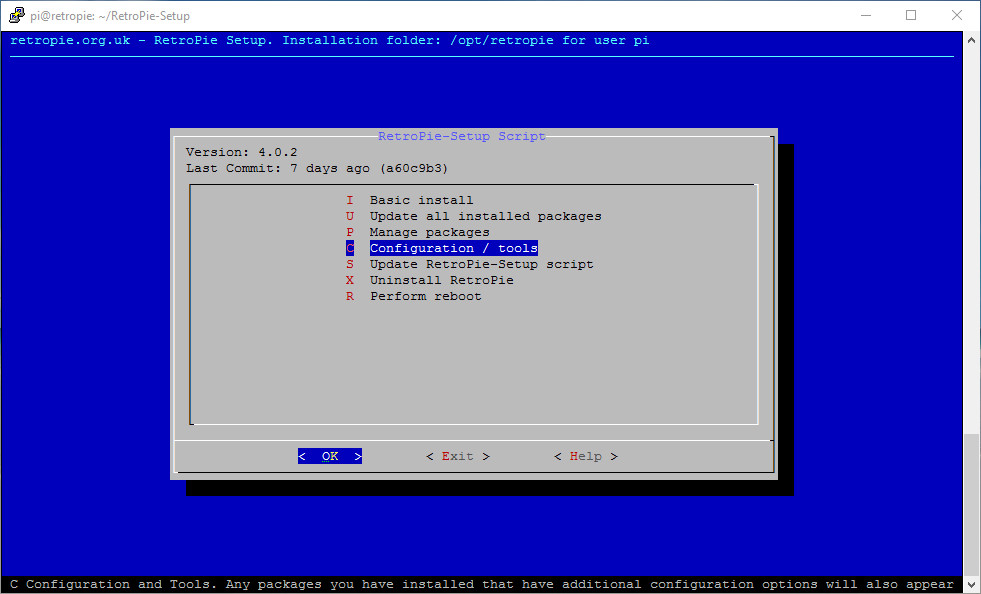
2) Choose the "Configuration / Tools" menu choice ![Config / Tools Menu]
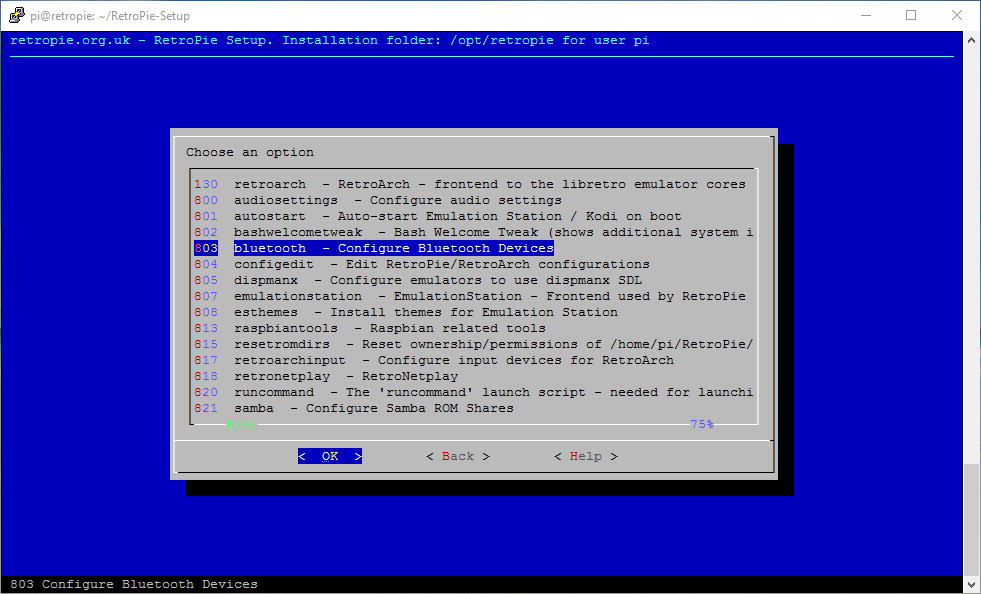
3) Choose the "bluetooth - Configure Bluetooth Devices" menu choice ![Bluetooth Menu]
4) Make sure the hack option is turned "off"
You need to make sure your controller is running the relevant [firmware]https://retropie.org.uk/docs/8Bitdo-Controller/#firmware-versions-for-8bitdo-controllers) for this to work correctly, the versions are shown in this wiki article. ![Hack Off]

5) Make sure your controller is powered on and searching for a connection. With the FC30 Pro, this is done by holding the power button (left-hand side of the base of the controller) on until the side blue lights illuminate. With the SFC30/SN30/SF30/N30/F30/NES30 (with [firmware]https://retropie.org.uk/docs/8Bitdo-Controller/#firmware-versions-for-8bitdo-controllers) v4.0+), this is done by first powering on the controller by holding the Start button for one second until the blue LED flashes, then hold the Select button for 3 seconds. The blue LED will flash rapidly to indicate pairing mode.
6) Choose the "Register and Connect to Bluetooth Device" ![Main Bluetooth Menu]

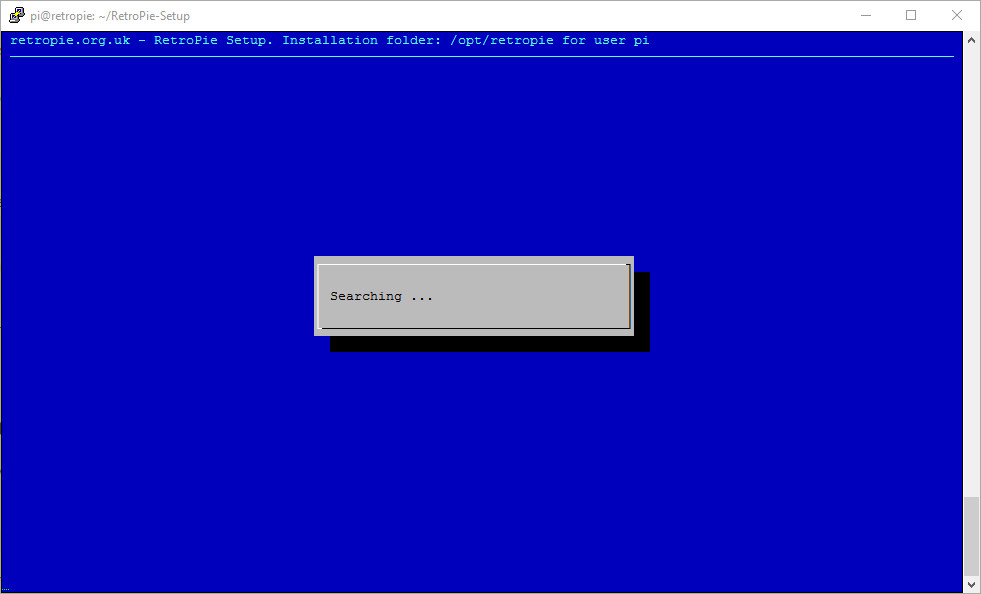
7) You will then see the "Searching" screen. If you have issues with the detection of the controller, you may find it helps to press some buttons on the controller when this screen is showing. ![Searching]
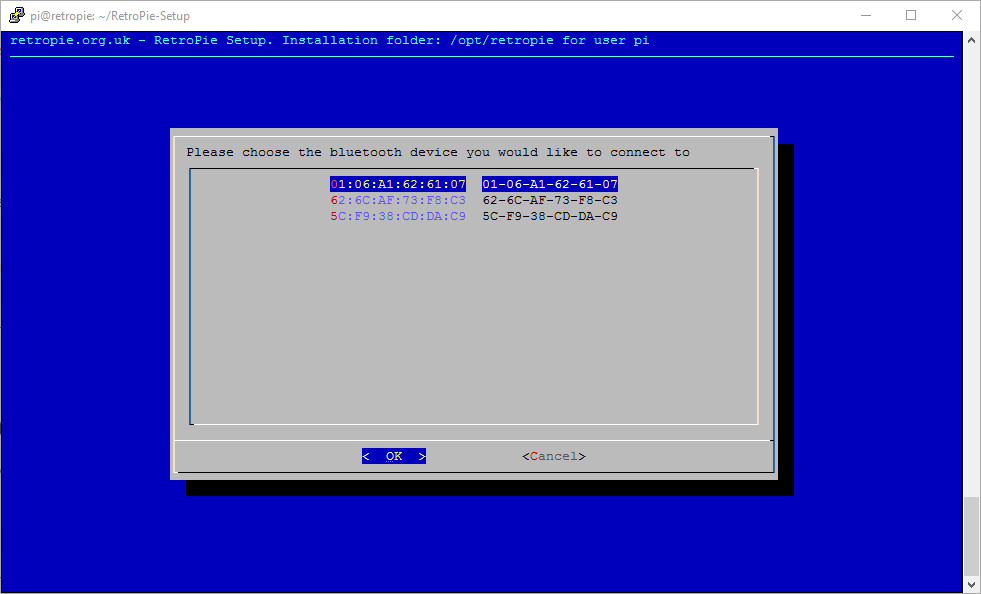
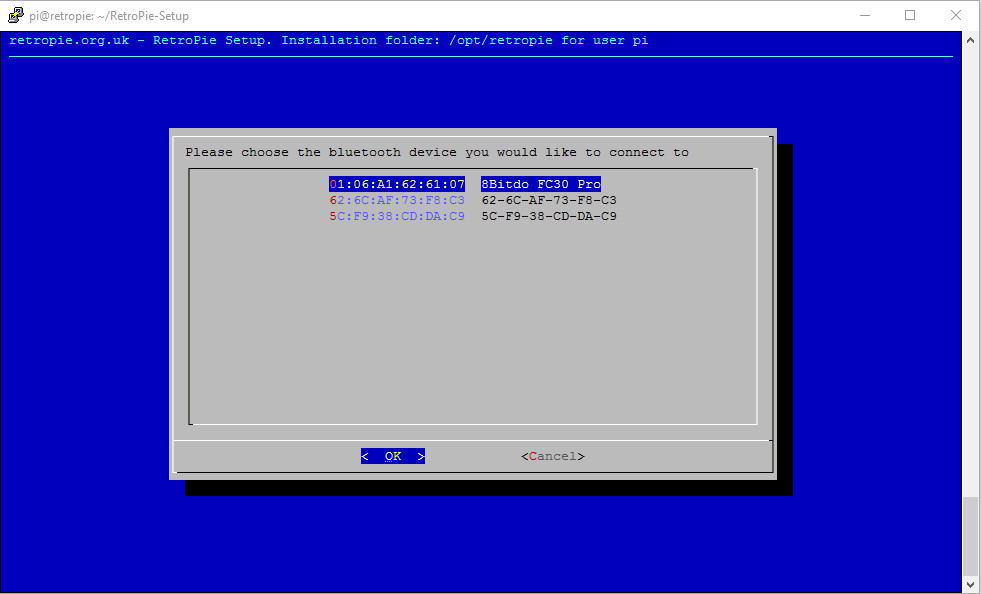
8) It may be the case that the first time the results are returned, the name of the controller doesn't show, or that the MAC address doesn't show at all. If that's the case, you can either select the device if you know the MAC or simply search again. ![No Name]
9) Here it has successfully detected the name of the controller, select OK here. ![Name]
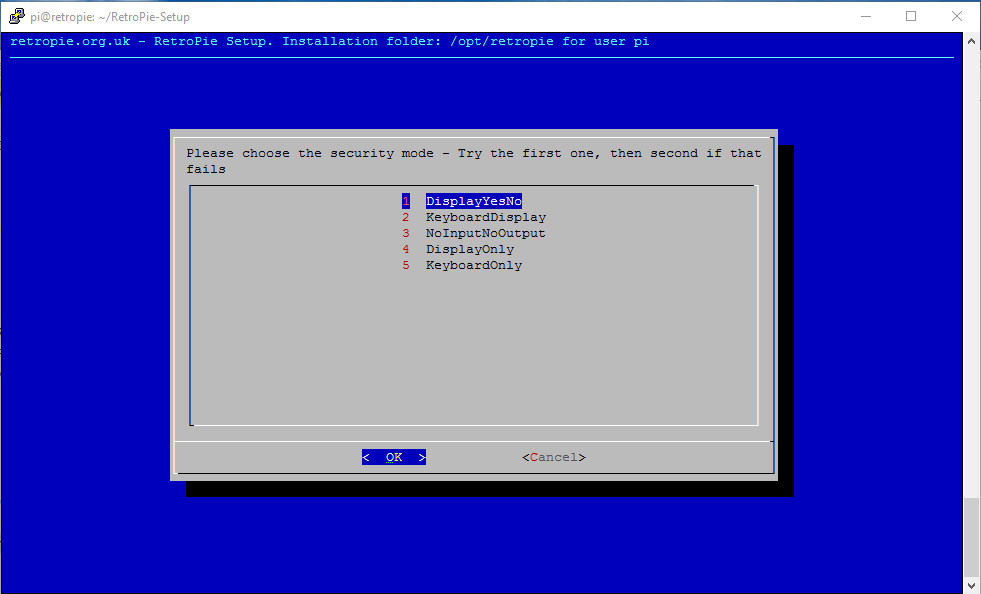
10) Choose the "DisplayYesNo" option to complete the registration process. ![Pairing]
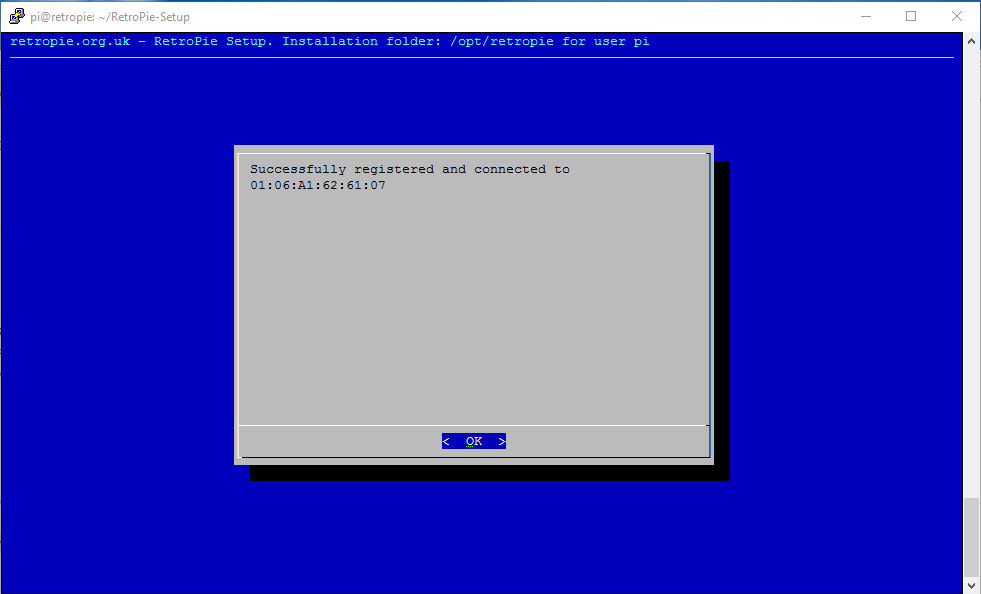
11) Registration of the 8bitdo controller is complete and your blue LED lights should now be solid on (the FC30 Pro will glow). ![Connection Success]
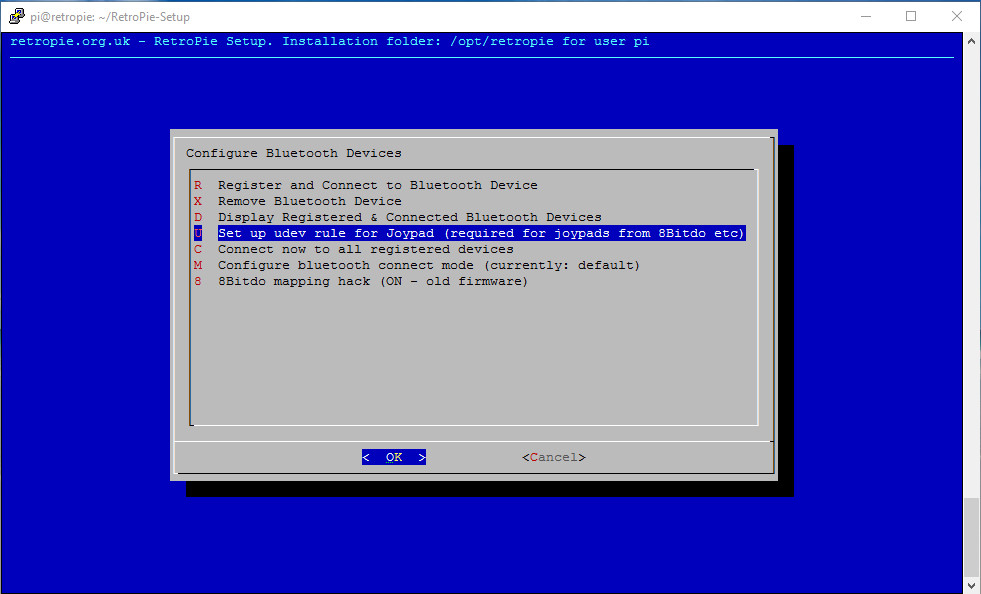
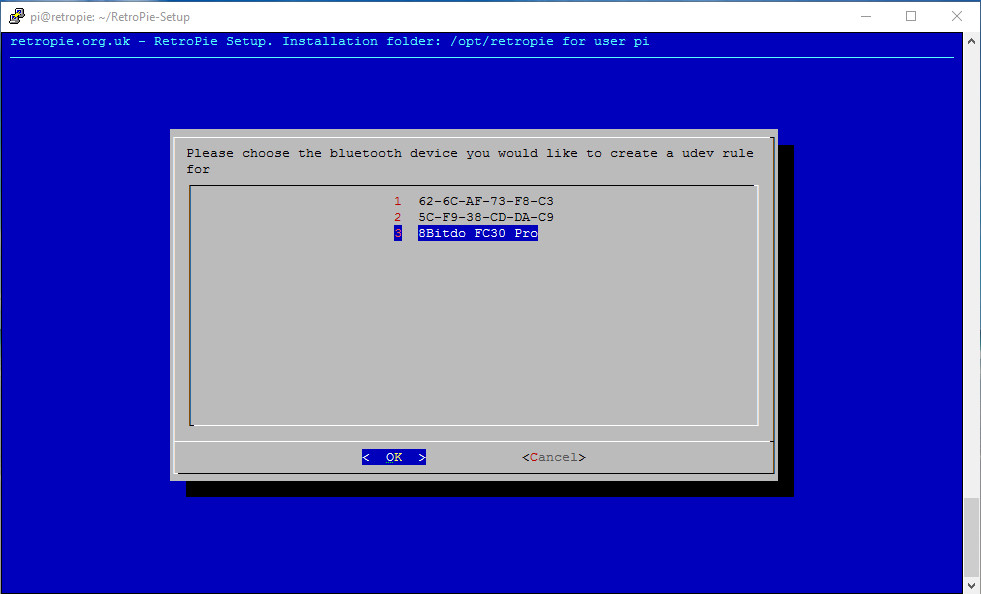
12) You must now setup the udev rule in order for Emulation Station to "see" the controller when you restart your Raspberry Pi. ![udev rule]
13) Select your controller from the list. ![Select controller]
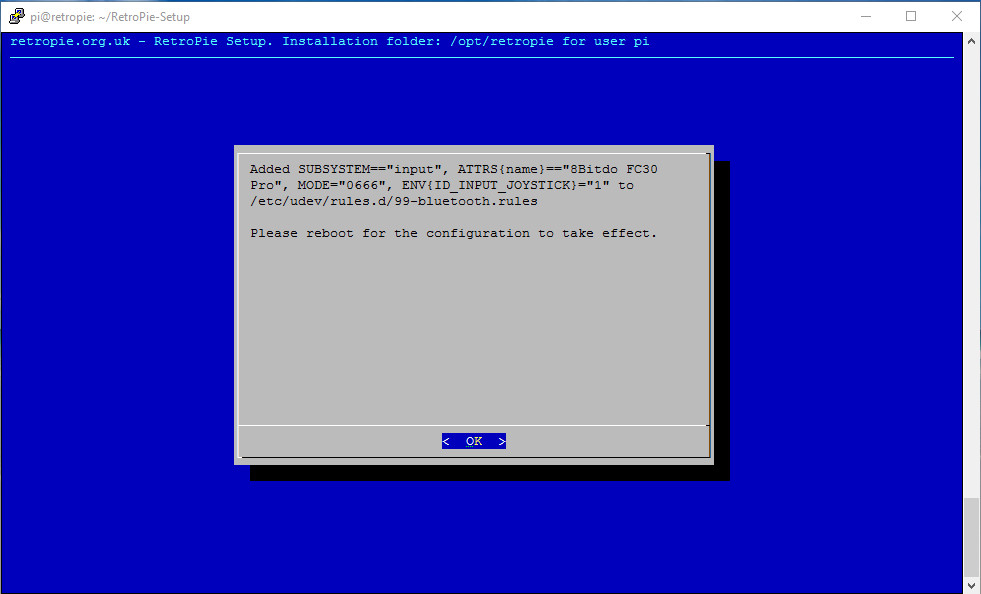
14) This then adds the rule to the file specified, you don't need to manually take any extra steps here. As indicated, you will need to reboot after completing these steps to make sure all the changes have taken effect. ![udev added]
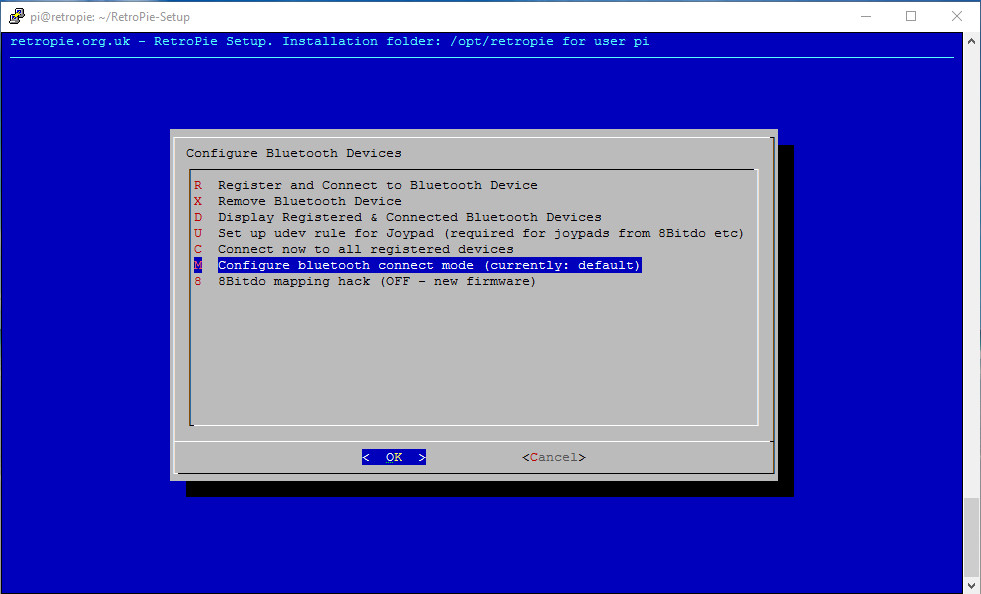
15) The menu "Configure bluetooth connect mode" is optional, but using this can be very useful. ![Optional Settings]
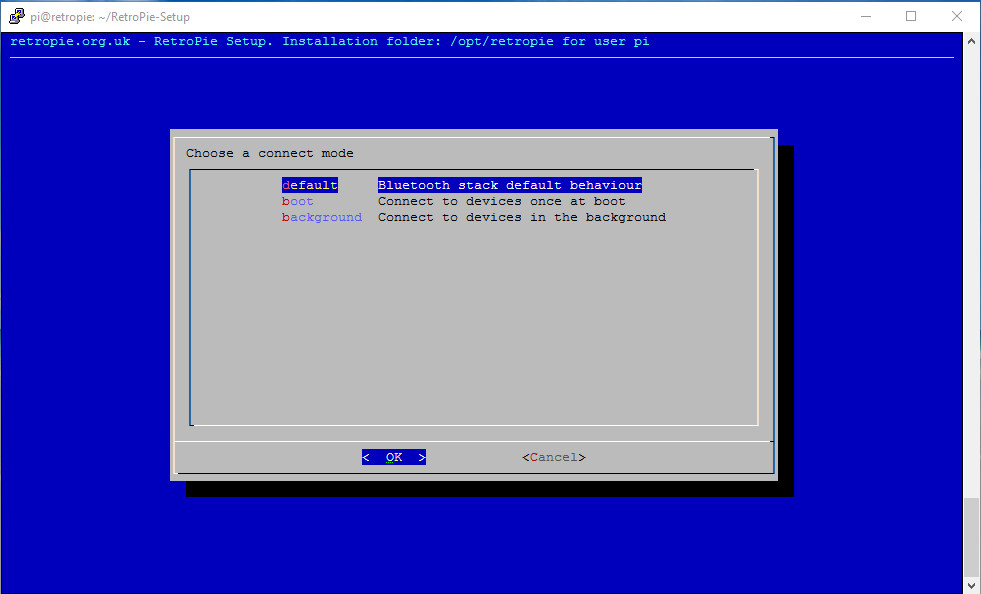
16) If your controller won't connect (LED change from flashing to solid) when restarting, change the mode to "boot". In most cases this should also enable the "background" option automatically, so you don't have to select this. If you have issues with the controller not auto connecting after waking from sleep/off mode, then try "background". ![Bluetooth connect modes]
17) When this has been set, please reboot the Raspberry Pi. Either during boot up or once in Emulation Station, when you turn the controller on it should connect without issue.
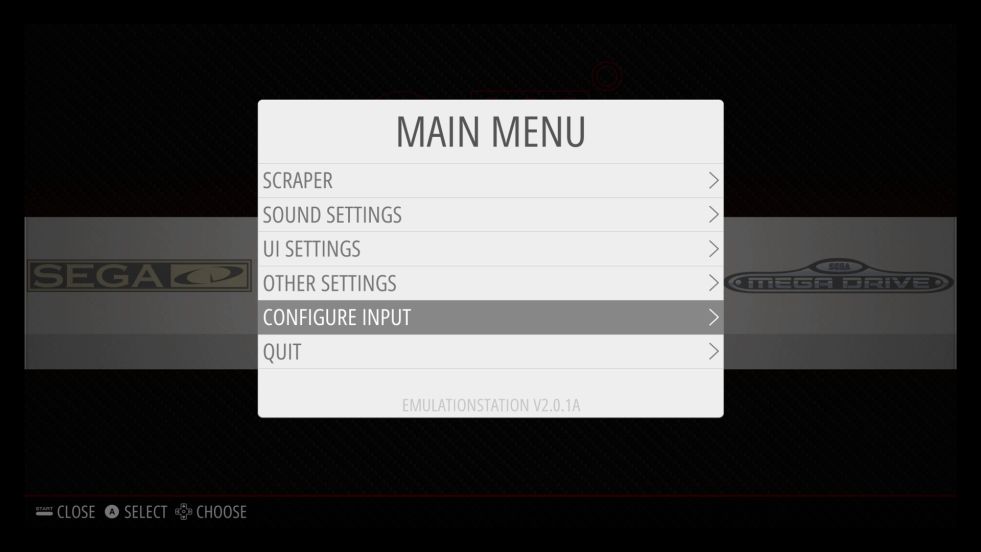
18) Configure the controller for Emulation Station and the emulators. Press Start in Emulation Station using your non-8bitdo controller and choose the "Configure Input" option. ![Configure Input]
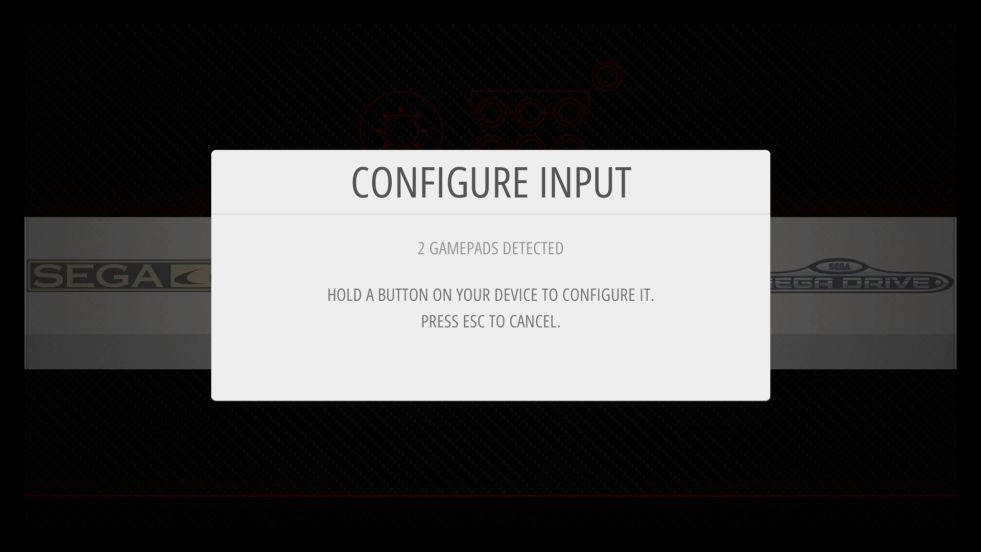
19) You should see that Emulation Station can now see your 8bitdo controller ![ES see controller]
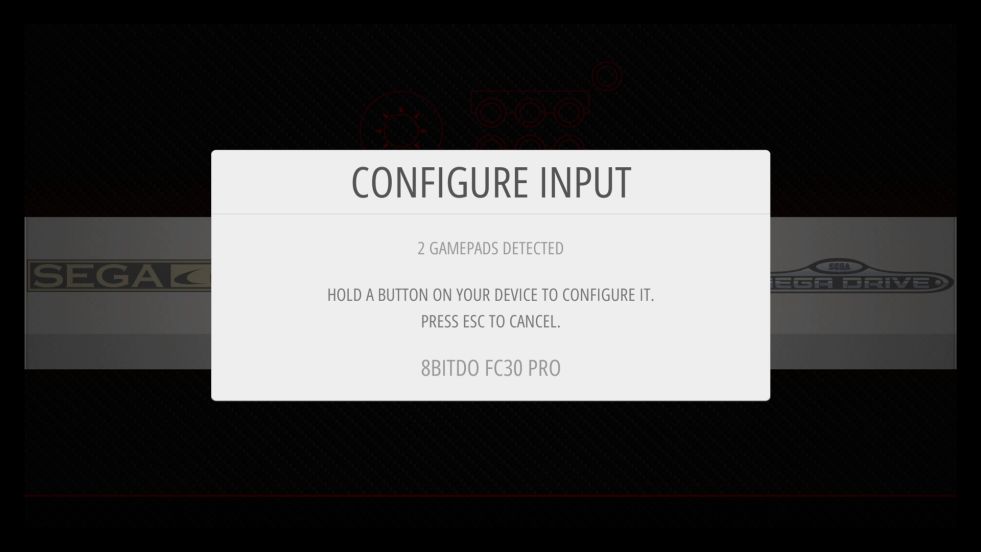
20) When you hold a button on your controller you should see its name appear at the bottom of the screen. ![ES shows name]
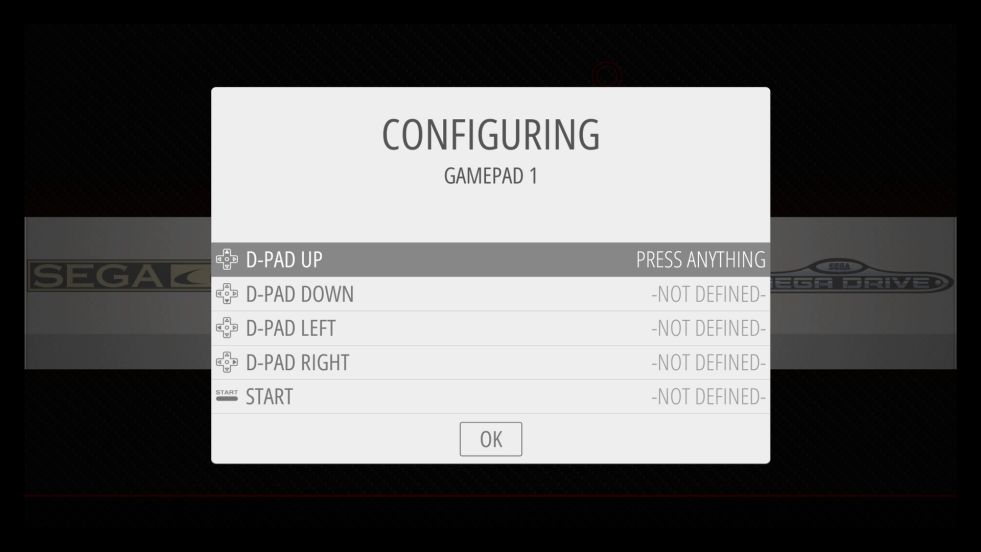
21) Follow the instructions as given here. If you make a mistake, just run the "Configure Input" process again. ![Add buttons to controller]
22) When that is complete your 8bitdo controller is ready to use!
The process will have written various controller configuration files for you. The main RetroArch controller file will now be in: /opt/retropie/configs/all/retroarch-joypads/
Here are some examples of the file that should be written.
FC30 Pro